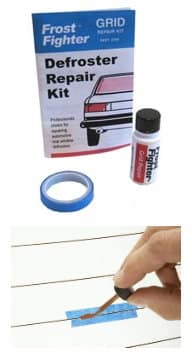
Frost Fighter Defroster Grid Repair
Improved 2120 Frost Fighter Grid Repair material features improved electrical properties, better bonding and uses the heat from the defroster to flash cure for fast defroster grid repairs. This is a breakthrough product improvement.
NEW Grid Repair Kit
Use when rear window defroster grid lines stop working. The fine horizontal heating elements on defrosters can be easily damaged by a single scratch or multiple breaks of the heating elements.
Repairs are made by masking off and painting the Frost Fighter grid repair conductor over the damaged area. The conductor bonds aggressively, dries quickly and is color matched for invisible repairs.
New Breakthrough Defroster Grid Repair Technology
The new 2120 Grid Repair material is a breakthrough technology featuring a tougher, more conductive repair that self cures in 20 minutes using the heat from the defroster. No more over night curing!
Repairs and Lengths
Each kit has 5 grams of repair conductor for up to 35 total inches of repairs using the recommended two coats. This quantity of material allows multiple repairs from a single kit. Repair multiple breaks in the defroster elements up to 3-5 inches in length.
To repair a grid just paint on the repair coating, air dry for ten minutes and then turn on the defroster. The heat from the defroster cures the repair. This is an easy repair you can do yourself and save the high cost of glass replacement.
Whats Included: Each kit comes with full instructions, grid masking tape, cap brush applicator and enough conductive repair material for several repairs. Each bottle contains enough conductive grid repair material for several repairs.
Working With The Defroster Grid Repair Kit
Repair Defroster Grid Breaks
If the defroster clears only part of the rear window, it’s usually a sign of a broken horizontal grid line.
 Step 1 : Find The Break
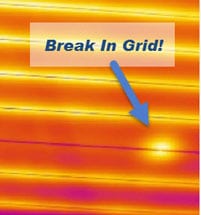
The first step in repairing this type of damage is to locate the break by visual inspection. The smallest break or crack can cause the defroster to fail. See the infrared images.
If the break in the defroster grid is not obvious after close visual inspection, use a volt meter or 12 volt lamp to help locate the damage. Turn on the defroster and touch one meter lead to each of the wide vertical bars along the sides of the defroster. The reading should be between 12 and 14 volts. If the volt meter shows a negative reading, reverse the leads.
Now take readings at various places along the horizontal lines of the grid to isolate the break.
When the probes pass over the break, the reading will change sharply.
 Step 2 : Repairing Defroster Grids
Once a break or breaks in the defroster grid has been located, it’s time to consider how to repair the problem.
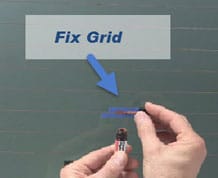
The NEW highly conductive 2120 Frost Fighter material is designed to repair grid damage. Use the tape to precisely mask off the damaged area of the defroster. There may be more than one break in the grid so locate all the damage before proceeding. The grid kit can repair breaks up to five inches.
After the damaged areas have been located and masked, apply the repair material using the cap brush. Frost Fighter grid repair kits use a highly conductive silver polymer repair compound. This polymer bonds aggressively to glass and provides maximum electrical conductivity.
 Step 3 : Flash Cure for fast repair
Allow the conductive repair coating to dry for ten minutes at temperatures above 70F (21C) degrees. If the temperature is below this use a heat source to warm the repair area for the ten minutes needed.
Now turn on the defroster. The heat from the defroster cures the repair in about 10 minutes. The defroster can be used at this point.
The conductor is color matched to the reddish brown colors used in automotive defrosters for nearly invisible repairs.
 Step 1 : Find The Break
 Step 2 : Repairing Defroster Grids
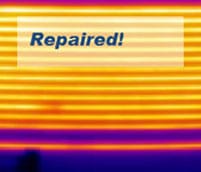 Step 3 : Flash Cure for fast repair