How to Replace Defroster Gridlines
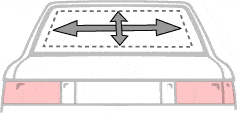
Interested in learning how to replace defroster gridlines in your vehicle? Prior to getting started on your ClearView defroster install, it’s a good idea to plan where you will source your power. Installing the wiring may require you to run wires under the chassis of the vehicle or through various parts of the vehicle, like under floorboards, to reach your power options. Determining how you are going to run your wires and where you want your switch to be placed will make for a more seamless and stress-free installation.
Step 1: Place & Stick Grid Lines
Thoroughly clean the window with the GAP-1 cleaner before applying anything to the window. Heat is your friend so install on a warm day, preferably above 75 degrees, or make sure you have a heat gun or hair dryer handy to warm the glass. When it comes to replacing defroster grid lines, heat is also very useful to help release the paper backing from the copper grids. Use a grease pen on the outside of the window to mark the position of the grid paper for easier installation.
Step 2: Apply Side Buss Bars
Make sure to read the instructions and diagrams carefully before this step.
The positions of the buss bars are critical to make sure the power flows correctly through the grid lines. Make sure you leave lots of extra length on the copper grids so that it’s easier to wrap them over the top of the buss bars. It even helps to tape those ends out of the way during the buss bar install. Warming up the black plastic cap will help to securely snap it in place.
Step 3: Trim Defrost Elements
Double check to be sure the copper grid lines are wrapped around and secured to all the appropriate connection points.
Then, carefully trim the leftover grids after making sure all the connections are good.
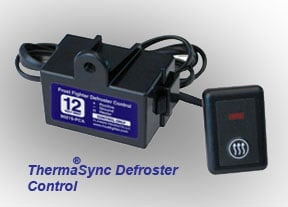
Step 4: Wire ThermaSync Control
Find a safe but hidden spot to connect the ThermaSync control box. Make sure to carefully read the instructions beforehand and note that it is easier to connect the wires of the ThermaSync controller prior to attaching it to its permanent home. The ThermaSync isn’t an overly complicated system, and all the connectors are color-coded for your convenience. Once you have decided where you want the ThermaSync box and switch, go ahead and install them both.
Step 5: Install the Fuse
This is a critical step. Make sure to use the fuse (either 20A or 25A) that was provided with your installation kit and, if you are operating other things on the same line, make sure the fuse can handle the total amps of all components on the circuit and that you’ve used the appropriate thickness of wire. In our demo we are connecting directly to the battery per the customer’s request, however as long as you find an equivalent gauge power wire source, you can connect virtually anywhere on the vehicle.
Step 6: Run Wire to Defroster
This is where pre-planning will pay off. Run the wire between the controller and defroster through the chosen path. Make sure to secure all loose wires. If you have extra wire, don’t trim it until the last connection step. Grounding is important to a successful install so make sure your ground wires are attached correctly and to a proper ground.
Step 7: Connect defroster
Once everything is in place, connect the defroster and turn on the vehicle. Hit the switch to turn on the defroster. If it’s still not heating up after 10 minutes, check the various connections starting with the fuse to make sure it isn’t blown. Work your way from the control unit back to the defroster, checking all of the connections. If all connections are working, fiddle around with the buss bar covers and make sure they are snugged down to make a solid connection. A volt meter will be handy for troubleshooting. Knowing how to replace defroster gridlines can help with all of your condensation and fog issues. If you’re still having trouble with your defroster gridline install, call us at 303-232-8788.


